Hi there! If you've jumped over here from the
Practical Scrappers blog then Welcome! I'm so happy to see you!! Today I am talking about using fabric on your projects and I'm sharing a number of ways in which I have done just that recently.
Fabric is a pretty hot trend in the paper crafting world right now and there are many types of fabric you can add to your cards and layouts. Some have been around for ages - think ribbon and lace - and some are fairly new - fabric paper for example. Today I want to show you how to take ordinary pieces of cotton fabric and transform them!
First let's make some embellishments out of fabric like I did here on these two cards.
Both these flowers were made using a piece of cotton fabric and a sheet of Multipurpose Adhesive for the Big Shot. Let me show you how I made them.
1. This is the Big Shot Multipurpose Adhesive Sheet as sold by Stampin' Up (see below for links). It comes 12 sheets to a pack and each sheet is 12"x12" so you can make TONS of projects from one pack. And they're not just for fabric, that's just what I'm showing you today. In fact, Stampin' Up also sells adhesive rolls specifically for fabric but since the Multipurpose sheets are great for paper too, I think they are a better deal for layout makers like myself.
2. Lay your fabric on your work surface face down (TIP: iron it first!! learned the hard way that those creases don't magically come out when you lay the adhesive sheet on top of them!) Peel off one corner of the adhesive sheet, turn it over and stick it down onto your fabric.
3. Slowly pull back the rest of the adhesive backing using a bone folder to keep it as straight and crease free as possible until the entire 12"x12" sheet is adhered to your fabric.
4. Trim off the excess and then use your bone folder again (or a credit card or ruler if you don't have a bone folder) to get out any remaining creases or air bubbles. And no, I was not able to get out that huge crease but as I was cutting the sheet in half to fit through my Big Shot I decided not to worry about it. Remember, IRON FIRST!
5. Cut your sheet to fit your Big Shot die - I used the Fun Flowers Bigz L die so a simple cut in half sufficed. If your die is smaller you may want to cut your sheet smaller to minimize waste. Make your Big Shot sandwich (cutting mat - Die - fabric - cutting mat) and run everything through your Big Shot (or other manual cutting system - whatever you have.)
5b. I found that some of my flowers didn't cut completely through, so when I ran my second piece of fabric through I used a scrap piece of card stock as a shim and the flowers cut out perfectly. In this picture you see the white card stock shim on top of the Big Shot sandwich - this is very important. If you put it under the top cutting mat you will just end up cutting out white card stock flowers as well as fabric ones. Maybe that's what you want ... maybe it's not!
6. Sit back admire your beautiful fabric flowers! :) I cut out two full sets plus a couple extra of the larger flowers to have on hand.
7. Time to assemble your card. Obviously, you would use whatever papers coordinated with your fabric, I am lucky enough to get to work with Stampin' Up papers and fabrics which are already pre-coordinated. So here I am showing you a piece of Riding Hood Red card stock (5.5" x 4.25" folded in half) and two pieces of the Twitterpated Designer Series paper which coordinate with that pink Twitterpated Designer Fabric.
8. I love to ink my edges. I find it gives added definition and "finish" to my projects. Here I am showing you how I do that using a Stamping Sponge that I've simply cut into a wedge shape. I am using Soft Suede ink - my favourite colour for inked edges!
9. Don't forget about your fabric flowers. They gain a lot by having their edges inked too!
10. For our first card I simply adhered my paper pieces as shown using my Snail Adhesive runner. Then it was time to start building my fabric flower embellishment. Carefully peel the backing from the largest die cut flower and adhere it to the card as shown below.
11. Continue this with the smaller flowers laying them down in a offset pattern being sure to keep them centred.
12. Finishing touches. I finished my card off with a button tied with some bakers twine and a sentiment stamped onto a piece of Whisper White card stock. Here is a close up of the finished flower.
13. For a more 3-dimensional flower like this one, I simply left the backings on each flower layer and used my bone folder to curl them after they were adhered together. With the addition of a Vintage Faceted Button, it looks like this on the finished card.
Well, that's one way to use fabric on your cards and layouts ... are you still with me? Want another way?
How about using it in place of paper? That's right, you heard me. Instead of pieces of patterned paper on this layout, I used pieces of fabric.
There are literally 3 pieces of paper on this whole layout (okay, 5 if you count the photos!) - the background card stock and the two pinked circles under the rolled fabric flowers. Everything else is fabric!
The large square of brown fabric was adhered using another Multipurpose Adhesive Sheet and the smaller pieces were adhered using Sticky Tape. (If I had a functional sewing machine I would have sewn them to the card stock but ... I don't, so tape and glue are my friends!)
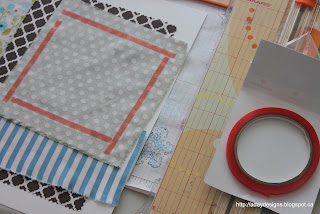
This is what my layout's starting point looked like.
Here a close up of the layers of fabric. Oh yeah, I also wrote my journaling right onto the fabric! Easy peasy!!
And now for my third way to use fabric on a layout or card - make a rolled flower embellishment like this one.
Here's how I did it.
1. Start with a giant glue dot - take off the top layer of plastic to expose the glue.
2. Twist your fabric and place one end in the middle of the glue dot.
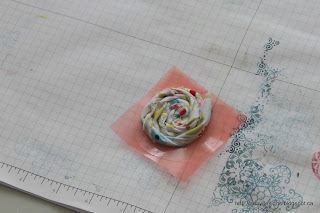
3. Keep twisting your fabric as you roll it around and around from the centre out until you are left with something that looks like this. The longer and thicker your piece of fabric the bigger and fuller your finished flower. I punched out a 2.5" circle of white card stock and used my pinking shears to pink the edges. Once it was mounted onto this I added a button and called it done!
I used smaller scraps of the brown fabric to make another flower - here's a close up of that one.
The strips were narrower and shorter so the flower is looser and smaller than the other one on the page.
One last way to use fabric on your layouts ... as trim like I did to anchor the photo on this layout.
Yes, that is yet another variety of fabric flower but this post is already reaching epic proportions so I think we'll save that for another time.
Thanks for joining me today as we explored my second favourite thing to stock pile ... FABRIC! As always, please leave a comment sharing ways in which you've used fabric and I'll be sure to pop over and check it out.
Here are your links for products featured in today's post:


