Shabby Blogs Background

Showing posts with label Elementary Elegance. Show all posts

Friday, March 30, 2012

Iron Stamper - Vellum Heart Card

Welcome to my Iron Stamper Series! If you are new to my blog and want to see what Iron Stamper is all about and look at my projects from the beginning, please start with this post.

Today I am show casing a card I ruthlessly cased from the Extraodinarily Talented Kimberly Van Deipen. She used an acrylic heart but I don't have any of the Window Sheets. What I DO have that I haven't played with nearly enough, is the 8-1/2x11" Vellum Paper, so I  made a few changes and came up with this card.

It starts with a card base of Blushing Bride onto which I layered a piece of Whisper White card stock and then a piece of Regal Rose that I'd run through my Big Shot using the Vintage Wallpaper Textured Impressions folder. To Create the heart I first stamped the image from Take It To Heart using Chocolate Chip ink onto Whisper White card stock. I cut it out using the Hearts Collection Framelits dies which I also used to cut out two larger vellum hearts. I layered them all together then surrounded the heart with Basic Pearls Jewel Accents. The packet has a variety of sizes including these small ones that are all glued together in a line. It makes it super easy to create borders like this or swirls and other flourishes.

The rest of the card came together pretty easily. I stamped the banner image from Take It To Heart in Chocolate Chip onto Daffodil Delight and then created my ribbon "tail" with a piece of Chocolate Chip 1/2" Scallop Dots ribbon and a piece of 5/8" Whisper White Organza Ribbon. To keep it all together I used a Fleurettes II Accents and Elements and a Mini Library Clip. The three mini tags were made with my Jewelry  Tag punch and Blushing Bride, Whisper White and Daffodil Delight card stock. The key image is from the Sale-a-Bration stamp set Elementary Elegance. This set will go away FOREVER tomorrow!! Place your orders of $60 to receive ONE FREE SALE-A-BRATION ITEM today!

Thanks again for tuning into this series. I really appreciate it!
Remember to leave a comment to be entered to win a prize at the end of the series and become a follower so you don't miss out on any of my fun projects. As I said above, Sale-a-Bration ends tomorrow so place your orders with me or through my on-line store today to receive FREE ITEMS with every $60 you spend. I'm not sure if I've mentioned it yet or not, but if you have ever thought about becoming a Stampin' Up! Demonstrator and sharing YOUR love of stamping and paper crafting with your friends, the Starter Kit is on sale during Sale-a-Bration. It's only $150 right now (valued at over $450 that's like getting $300 worth of FREE PRODUCT!!) and you also get a free pack of Designer Series Paper OR a free Digital Download EVERY MONTH FOR A YEAR!  That is some serious savings!! For more details click here or email me and I'll help you get started.

Have a great Friday everyone!

Monday, February 27, 2012

Vintage Birthday Card

Today is my brother's Mother-in-law's birthday. She has felt like another mother to me since Andrew and Jonina started getting serious and our kids refer to her as Amma Lynne, just like her actual grand kids do. So when we were invited over to my brother's to celebrate not only Marley's birthday but Lynne's too, I knew I had to make something special for her. I went into my stash of samples created by the clever ladies in my uplines and here is what I came up with.

I used what has become my go-to DSP when I want a vintage vibe - Everyday Enchantment from the Sale-a-Bration catalogue. I embossed the bottom layer with the Stripes Textured Impressions folder and inked the edges with Soft Suede (LOVE this ink colour! use it on most of my edges). The other pattern is actually the back side of the red patterned paper. I simply inked all the edges and mounted it on Very Vanilla before adhering it with Dimensionals. I cut out the doily with my Paper Doily Sizzlits Die and then brushed it all over with more Soft Suede. 

The sentiment was a multi-step process. First I stamped the curly frame image from Elementary Elegance Stamp set with Early Espresso ink. I then stamped over the image (as closely as I could) with some Versamark ink and heat embossed it with clear embossing powder. (I was rushed taking the pictures so it doesn't really show up. Bummer! Trust me when I say that the gloss is there - it's subtle but it adds quite a bit to the over all look of the card.) Then I nestled the Happy Birthday sentiment into the same frame image stamp and stamped the whole thing with Baja Breeze. This allowed me to cut out the inner frame and mount it with Dimensionals onto my embossed image. 
A little bit of the Pleated Satin Ribbon in Baja Breeze finished it off.


Thanks for checking out my little card. I'd like to take a moment to remind you that you have a little over a month left to earn free products like the DSP and stamp set I used on this card. Sale-a-Bration ends March 31st so place your orders now. Any orders of $60 qualify you to one free item. To check out the available products please follow this link.

Friday, January 6, 2012

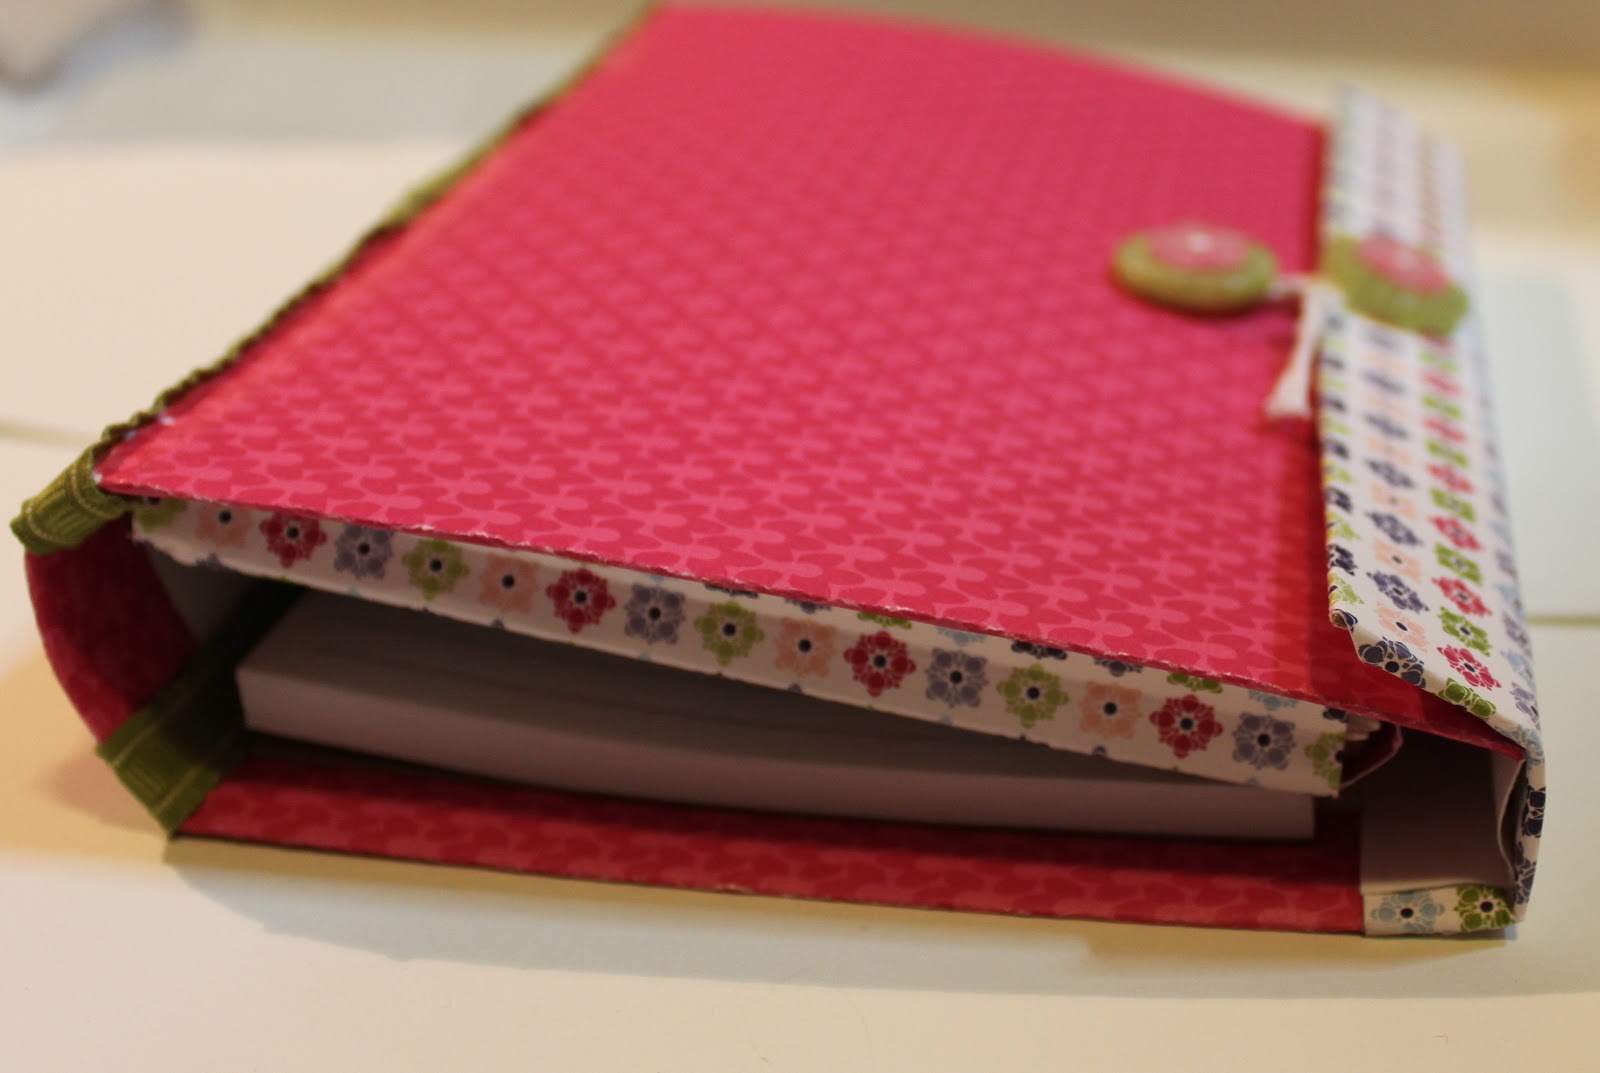
Birthday card and notepad gift set

Okay, I promised a view of the gift I made for my aunt. Here it is ...


I covered a piece of thin card board (actually, a cut down cereal box) with some Cheerful Treat DSP  and then added a note pad and a pocket to contain some cards.  


Here are the cards I made. I had some fun with the products and techniques for each card.
These first two may seem occasion/gender specific but I truly believe they can be used for any number of occasions. Graduation, marriage/engagement, new job, baby, etc.


I embossed the background paper then inked the edges with Soft Suede. The sentiment was cut out using the new Framelits Label Collection and stamped with the Elementary Elegance stamp set (available soon - it's in the Sale-a-Bration catty!) Believe it or not, the two pieces of striped patterned paper are from the same sheet of paper! See how where you cut out your label shape changes the entire look of the paper? Makes Stampin' Up!'s DSPs so versatile.

For this card I embossed the Melon Mambo card stock and then used my 2 1/2" circle punch to punch out the circle and half circles. The background image was created using various stamps from the Circle Circus stamp set in Melon Mambo, Blushing Bride and Concord Crush. For a little bit of sparkle I added some rhinestones. (I see that one has gone wandering ... oh well, too late to fix it now!)

For this one I used my Scalloped Trim Border punch all around a piece of Lucky Limeade card stock which I then stamped in Lucky Limeade with an image from the Take It To Heart stamp set. A banner in Melon Mambo and a few pearls finished it off.

This one may be my favourite. The butterflies are cut and embossed using the Beautiful Wings Embosslit die. I added the little antenae with a Stampin' Write marker. The curvy sentiment is from the Flight of the Butterfly stamp set.

And last but not least, I embossed the Concord Crush card stock and then rubbed some Whisper White Craft ink over the embossed image. Love that effect! The middle cut out was inked (liberally) with Lucky Limeade and an image from the Posy Punch stamp set was stamped in the middle. The Happy Birthday is popped up with Dimensionals.


To help keep things closed, I added these buttons and used some Bakers Twine to join them together.

Some Lucky Limeade Ruffled edge ribbon along the spine finishes things off.

Hope she likes it! Clicking on any of the links above will take you to my on-line store in case you want to purchase any of the products or check out pricing information. To see the new Occasions Mini, please click here.