Shabby Blogs Background

Showing posts with label Occasions Mini. Show all posts

Wednesday, April 4, 2012

Sweet Shop, Buttons and Balloons

As promised, here is the card I made for my husband's "graduating" soccer player. Yesterday I showed you the one I made for her Mom (see it here.) 
As this card was for a 6 year old girl, I knew I wanted it to be fun. What's more fun than candy? The Sweet Shop DSP in the Occasions Mini is perfect for making fun cards. Here's what I came up with.

The card base is Whisper White card stock onto which I've layered pieces of  Lucky Limeade and Wisteria Wonder card stock and then two different patterns from the Sweet Shop Specialty Designer Series Paper. I stamped images from Button, Button in Island Indigo, Calypso Coral and Pool Party then used a matching brad from the Printed 2011 In Color Designer Brad collection to jazz it up a bit. The last little bit of detail is the Lucky Limeade 3/8" Ruffled ribbon I attached to each side of the button strip.

Here's a close up of that ribbon and the stamped button strip.

Inside the card I wanted a sentiment that reflected Greg's feelings of "wishing her well in her future endeavors". Since I didn't have anything  that said that specifically, I went with this sentiment and some images from Up, Up & Away.

My Birthday Cards for All Ages class on April 13th will be featuring this stamp set and I have been having fun creating all sorts of examples. Please head on over to my Events page to get more details on the class and to RSVP. Use your coupon - if you got one! If you want to be in the running to get future coupons take a moment now to put your email address into the box on your right and get my monthly newsletter. You'll get  tips, sneak peaks and first dibs on all my classes so sign up today!


Saturday, March 31, 2012

Iron Stamper - Two Quick Cards Today!

Tomorrow will be my last post in this series and will feature an Easter card that will knock your socks off! Be sure to check back!!

Before I get started I just want to remind you that SALE-A-BRATION ENDS TODAY AT 10:59PM PST!!! Get your orders in to me for your last chance to earn free products this year. Check out the brochure to see all the great products you can earn for free by clicking the ad on the side bar to your right. To see what is available in the Occasions Mini or the 2011-2012 Idea Book and Catalogue click on the links - remember a $60 order (pre-tax etc) earns you ONE FREE PRODUCT from the Sale-a-Bration brochure.

Okay, on to today's cards. These are SUPER simple cards featuring the Spring Fever Simply Scrappin' kit in the Occasions Mini.

What did I tell you? Super simple, right? But fun and something I'd be happy to receive. What about you?
I started with my Daffodil Delight card base. I trimmed about a 1/2" off one side and then used my Scallop Trim Border punch on that shortened side. I then backed it with a piece of Whisper White. The banner is one of the border stickers from the kit - cut down to fit. I dressed it up with some of the smallest sized Paper Daisies and a Basic Pearl Jewel accent. To colour the paper daisies (they come in white only) I simply placed them on my ink pad (I think I used Blushing Bride but I can't remember now - oops!) and used my tweezers to push them into the pad until they were saturated with colour. Allow them to dry thoroughly before trying to glue them to the card OR the pearls to them!!
A simple sentiment (this one is from my absolute favourite stamp set from Sale-a-Bration - Elementary Elegance) stamped in Chocolate chip and your card is finished.

Next up, an Easter inspired card. 

I started with a base of Daffodil Delight again but this time I made a 5" square card. I layered a piece of the patterned paper from the Spring Fever Simply Scrappin' kit over top. Then a 3" circle of the Melon Mambo textured card stock from the kit which I cut out using my 3" Circle Originals Die and my Big Shot. The rest of the card is made up of various stickers from the kit simply layered on top of each other in a pleasing manner.

The middle one I popped up with Dimensionals for some added interest.

There you are. Two cards which took me probably 15 minutes to make ... total!! Sometimes it's not so much the level of detail or the amount of product you put onto the card but the act of actually sending or giving a card that matters. So having an arsenal of quick and easy cards to pull out when the occasion calls for it is priceless!

Thanks for stopping by. Remember to leave a comment on this or any of the posts in this series to be entered to win a little prize (go here to start at the beginning). Bonus entries if you become a follower or sign up to receive my newsletter. It will be winging it's way electronically tomorrow and contains a valuable coupon and information about upcoming classes. You don't want to miss it so enter your email address in the box in my side bar right now!! :)

Have a great weekend everyone!

Thursday, March 29, 2012

Iron Stamper - You're A-Maze-ing Card

Hi there. Thanks for continuing to check out my Iron Stamper submissions. If you're new to this series and want to start at the beginning please go here.

Today I am showing you the card I made using the Maze Game piece from the Occasions Mini.
I'll admit to being totally stumped when I saw the Maze in our Iron Stamper kit. There is a coordinating stamp set which is really cute - mouse, cheese, ... let me show you.
Now, I don't own this stamp set but I really wanted the image so ... I took the catalogue, colour photocopied it, cut it out and voila! My card was born! I know, I know, this is technically cheating but ... I prefer to think of it as being resourceful!! :)


My card base is a piece of Daffodil Delight card stock. I then took a piece of Whisper White card stock, ran it through my Big Shot with the Perfect Polka Dots Textured Impressions folder and layered it onto a piece of Regal Rose card stock. The hole is made with my 2-1/2" Circle Punch. It was a bit tricky punching through all the layers but with a little effort I was able to. The Stampin' Up! punches are super durable!!
I dressed up the front of the card with layers of Chocolate Chip, Daffodil Delight and Regal Rose card stock punched using my Scallop Edge Border Punch and a piece of the 3/8" Pleated Satin Ribbon in Blushing Bride for some textural variety and a bit a sheen.
The sentiment was cut out of the photo copy I made earlier and layered onto Blushing Bride and then a Chocolate Chip banner I made using the Take It To Heart stamp set from the Occasions Mini.


Here's a close up of the Maze Game peaking through the card front. I added some Regal Rose and Daffodil Delight hearts made with my Fashionable Hearts Embosslits  Die.

Thanks again for stopping. Please leave a comment so I know you were here and to get you into the running for a little prize I've decided to hand out at the end of this series. If you liked what you saw and don't want to miss the rest of the series please become a follower!
I also wanted to remind you that time is rapidly running out to get FREE SALE-A-BRATION ITEMS WITH PURCHASES OF $60.  Sale-a-Bration ends on Saturday March 31st so there are only a few days left!! 
And finally, sign up to receive my newsletter by entering your email address in the box in the side bar and you will receive a FREE COUPON with April's newsletter.

Sunday, March 25, 2012

Iron Stamper - Card Keeper

As promised, here is the first of my Iron Stamper posts.
First up, my 3-D item - the Birthday Card Keeper.

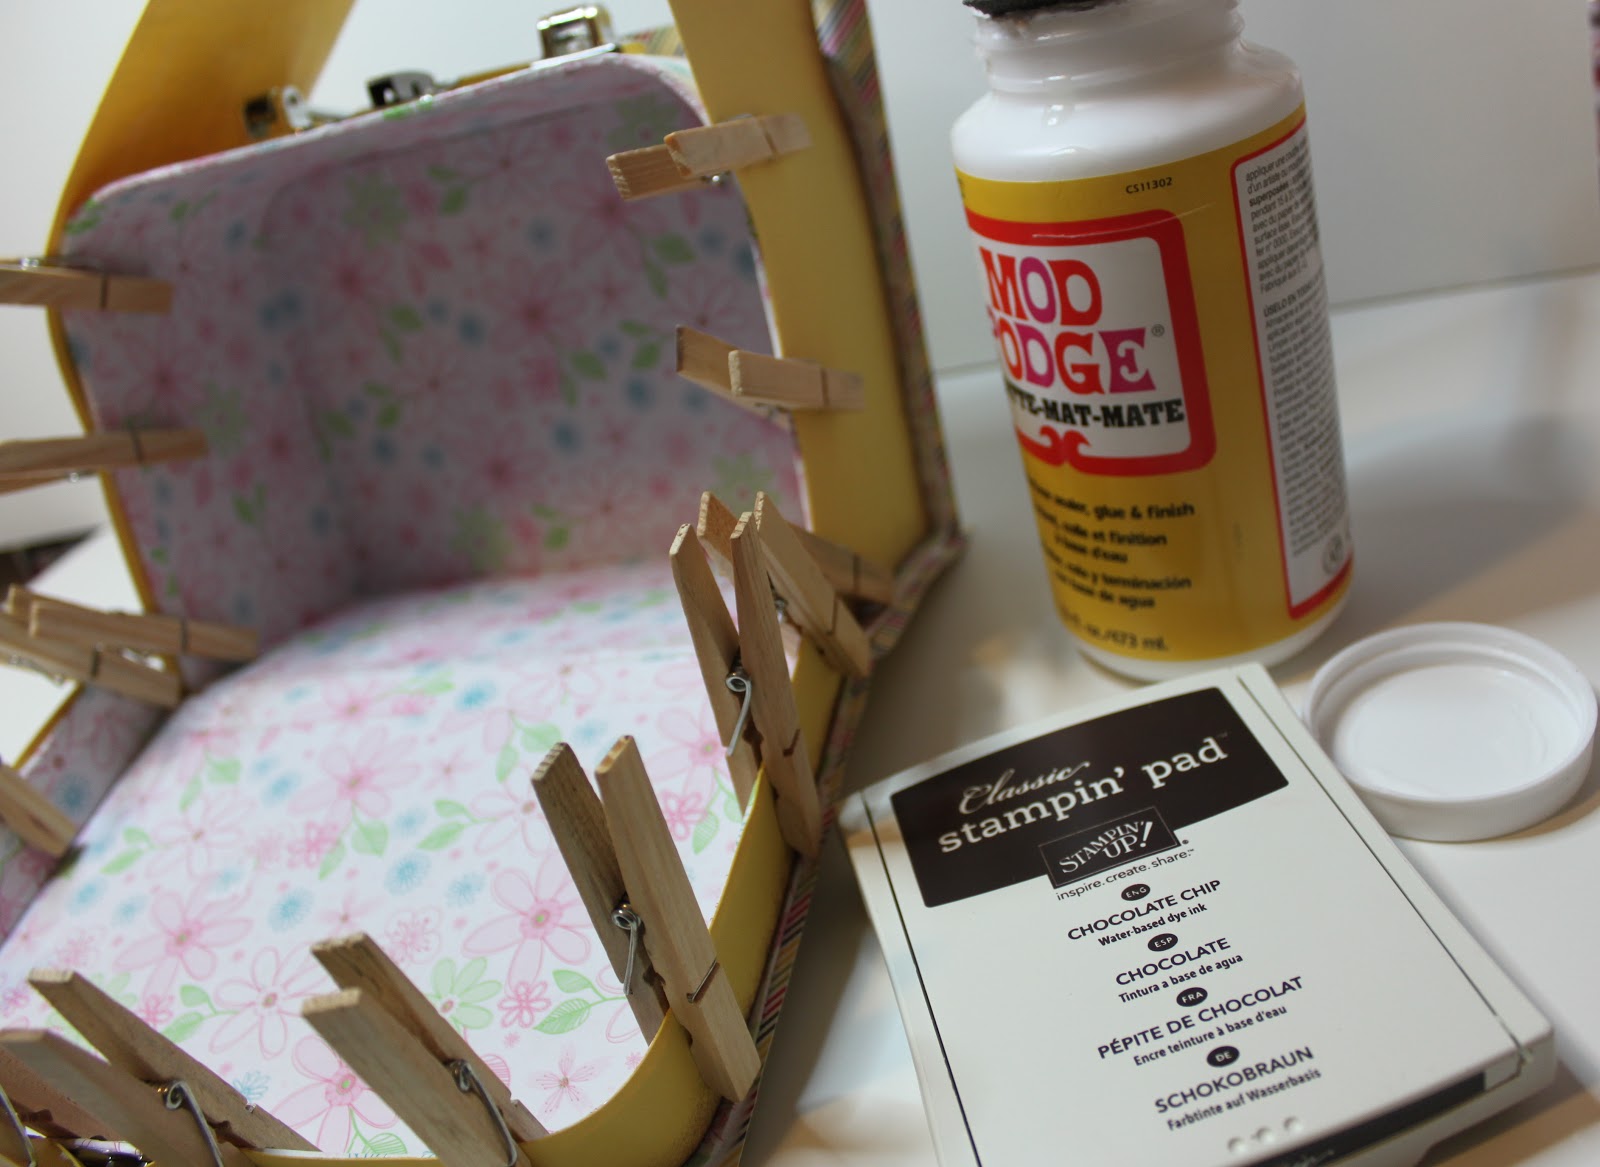
I started with this cute little $2 suitcase from Dollarama.

I cut, inked and pasted card stock to both the inside and outside ... 


to eventually end up with this.

In my entire suite of products I decided to also feature the Spring Fever Simply Scrappin' kit from the Occasions Mini so anytime you see any patterned paper or colours of card stock not in the original Iron Stamper Packet, it's from this kit. 

For the top of the lid I used my Labels Framelits Dies to create this layered frame - which is the perfect place to identify all those that might receive a card from you! The stamps are all from the Family Reunion stamp set - I love how this set covers everyone in your family!

To dress up the lid I added a couple of flowers.  
This one starts with the largest size of Paper Daisy which I had spritzed with Chocolate Chip ink using my Colour Spritzer Tool. On top of that is a stamped, embossed and punched out Regal Rose flower made by using the Mixed Bunch stamp set, white embossing powder and the Blossom punch. Then I added another, smaller, Paper Daisy (also spritzed), a stamped 3/4" circle of Lucky Limeade and a Large Pearl. As a final step I sprayed the entire flower lightly with alcohol spray which made the Chocolate Chip on the top Paper Daisy run to create a cool water colour look. When that top Paper Daisy was wet I scrunched it up and didn't un-scrunch it until it was dry! Oh, and the leaves were made by stamping another image from Mixed Bunch with Lucky Limeade, punching it out with the Blossom punch and then cutting the flower into thirds! 

The other flower on the lid is a simpler version of the one above only this time I didn't spray the whole thing with Alcohol ink.

Here's another look at the front again.
Around the handles (mostly to hide the horrible cut job!) I used more Blossom punched flowers cut to fit plus some of the DSP from the Spring Fever kit. I finished it off by tying a bow with the Whisper White 5/8" Taffeta Ribbon. 

Here is a picture of it open and filled with cards.

Thanks for checking me out! If you enjoy what you see please do leave a comment and make sure you're a follower as I've got a whole week devoted to all the Iron Stamper items you see in this picture above. I wouldn't want you to miss any of them!


Sunday, March 11, 2012

Sale-a-Bration Celebration!


Come and visit my "studio" (a.k.a my living room!) and see what this Sale-a-Bration thing is all about. I'll have copies of the brochure as well as the Occassions Mini for you to keep. There will be make and takes and door prizes and yummy treats too!

When: Saturday March 17th 10:00AM -1:00PM
Where: 4594 63 Street, Delta (Ladner)

Please RSVP to alisonday@eastlink.ca or 604-940-5508

Bring a friend I've never met before and you'll both receive a free gift plus a special coupon to attend a future class. 


We'll be having a Hostess Drawing too. What's that, you ask? Each person who makes an eligible purchase will get an entry to win the Hostess Dollars from the entire order. 

For every purchase of $30, you will get one entry. 
A purchase of $60 gets you two entries PLUS a free Sale-a-Bration item. 
Any purchases of $200 will earn you FIVE entries plus 3 free Sale-a-Bration items plus a free tote bag!


Here is a reminder of our Sale-a-Bration Hostess dollars.


We will also be having several door prize drawings. To get entries for them please RSVP (one entry), bring a new-to-me friend (one entry) and/or a snack to share (one entry).


Can't wait to see you and show you all the new and exciting things Stampin' Up! has. 


Tuesday, January 24, 2012

Big Blue Eyes

I've got another layout of one of my beautiful daughters to share with you today. I've mixed several paper lines - just proves how versatile Stampin' Up! products are!!


This is Paige and the final of the portrait shots that we had taken this past December that I plan to scrap. 
I'm planning to enter this layout into Elle's Studio Thursday sketch challenge so here is the sketch we were given.

For my layout I started with a piece of 12x12 card stock in Bashful Blue. I inked the edges with Concord Crush and then layered  a piece of Sweet Shop DSP on top. The photo and journaling block (just a piece of Whisper White card stock) were mounted on Concord Crush card stock and then I added strips of papers from Cheerful Treat and Flirtatious DSP. 


One of the papers in the Flirtatious Specialty DSP is these awesome laser cut doilies so for the title I cut out three of them, layered them over some more Cheerful Treat paper and a piece of 1/2" Stitched-Poly Ribbon in Concord Crush and adhered my letters on top. The word BIG is from the Word Play stamp set and originally said 'Wish Big' but I only needed the second word so just cut off the top of the stamped image.


I treated my letters in the same way as this layout. These are from the Alphabet Soup On Board set. First I inked them up with Bashful Blue, then I coated them in Crystal Effects and finally, to accent the word 'blue', I added a bit of Dazzling Details while the Crystal Effects was still wet. NOTE: I would do a second coat of ink before adding the other products next time. I'm not super happy that the letters look more grey than blue. But ... it is what it is.


For this embellishment I cut out another of the laser cut doilies and added a plastic flower (from my Twelve embellishment tin so not Stampin' Up!) and a Glimmer Brad. I also added a couple other brads from the Sweet Shop Jelly Bean and Everyday Enchantment collections. The Everyday Enchantment Ribbon and Brad pack is exclusive to the Sale-A-Bration catalogue so I can't provide you a link but to view the catalogue please click here.

Here are more of the brads I used on this layout - more than I normally use, to be honest! The green one is another from the Sweet Shop Jelly Bean brad collection and the lighter purple one is from the IN COLOR Printed Designer brads.


Saturday, January 14, 2012

New products to showcase

I've been playing a bit (lot) lately in my craft room (hole) and wanted to share some of the items that I've cranked out. First up are some Valentine's Day cards using new products from the Occasions Mini and the Sale-a-Bration catalogue.

I will be sending these to 4 of my fellow ScrapHappy members for our Valentine's Day Card Swap.
They were fun and fairly easy to do so I am thinking I may have to offer a class!

For this one I started with some Very Vanilla card stock (cut and folded to make a 5.25" x 5.25" card) which I inked around the edges with Poppy Parade. The patterned papers are a DSP from the upcoming Sale-a-Bration and called Everyday Enchantment. I used the new Framelits Dies Hearts Collection to cut out my hearts and edged the largest one with the 3/8" Pleated Satin Ribbon in Pear Pizzazz. The stamped image in the centre is from Take it to Heart as well as the banner image. I used stamps from I {Heart} Hearts and Itty Bitty Bits to decorate the banner.

I played with the colour scheme on this one but the general design is identical. The ribbon I used here is Victoria 5/8" Crochet Trim which is normally vanilla but I ran it over some Poppy Parade ink as that matched the paper better. Love how the look is completely changed! 

Note: make sure the ribbon has extra drying time before you start manipulating it or you will be left with red fingers!! :)

And since I had all the papers out and was in a crafty mood I created this.


This is my most favourite layout to date! It was pretty involved but I am so in love with the results I think it's going to get framed!
I started with the HUGE rosette. I'd started making one weeks ago when my friend Sandra came over to play with all our new products. Once I saw just how big the rosette was going to be I put it aside until I could figure out how to use it. 
Well, inspiration hit yesterday! 
This is a new die for the Big Shot called Designer Rosette. Here I used the die 4 times and glued the 4 rosette quarters together to form this giant one. Then I went hunting for some paper to set it off and found myself drawn back to the Everyday Enchantment that I'd already been using. 

I had cut out this scalloped heart earlier using the Heart Framelits and tried layering a doily I'd also cut out earlier using the new Paper Doily Sizzlits Die. I liked the look and when I added a the stamped image on top I was in love. I stamped the image in Basic Grey to match the framing of my black and white photo.


This picture was one taken in December when our family went for formal portraits. I mounted it first on Sahara Sand and then on Basic Grey card stock. Then I wrapped it with some Calypso Coral 1/8" Organdy Ribbon from the Sale-a-Bration catalogue. I affixed the bow with a matching Printed Designer Brad - the brad and the ribbon are being sold in a combo pack and they match the Everyday Enchanment DSP. Yummy! Finally I punched out a butterfly, added the date and tucked it under the bow (see below). 

A close up of the bow/brad/tag combination.


And last, but certainly not least, the title. I took some of the On Board Alphabet Soup letters, covered them with Calypso Coral ink and then put a layer of Crystal Effects over top. Love them!!

Here's a shot showing the dimensionality of the layout. The letters look precarious but they are glued down pretty well!
Oh, and the spray you see was achieved using the Color spritzer Tool and my Basic Grey Stampin' Write Marker. Now that I've finally figured out how to use it properly, it's become a bit of a go-to tool. I love the fine mist it creates. Perfect for a slight antiqued look.

Well, there you have it. Thanks for stopping by.

Friday, January 6, 2012

Birthday card and notepad gift set

Okay, I promised a view of the gift I made for my aunt. Here it is ...


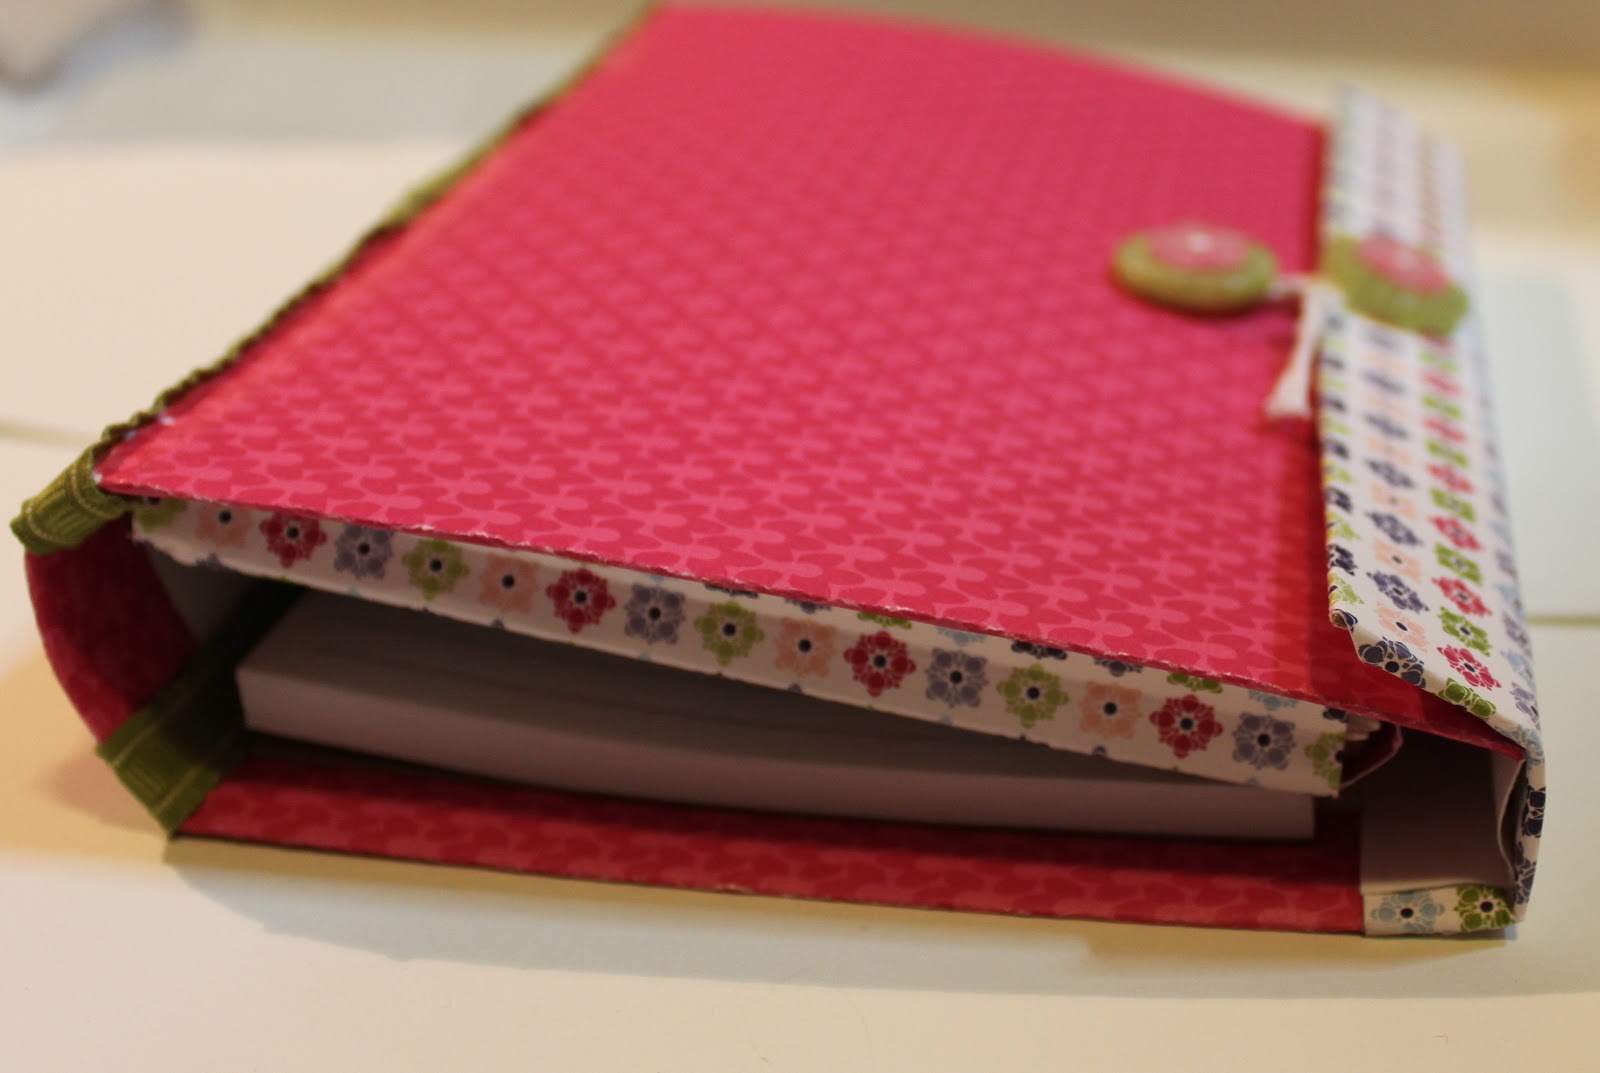
I covered a piece of thin card board (actually, a cut down cereal box) with some Cheerful Treat DSP  and then added a note pad and a pocket to contain some cards.  


Here are the cards I made. I had some fun with the products and techniques for each card.
These first two may seem occasion/gender specific but I truly believe they can be used for any number of occasions. Graduation, marriage/engagement, new job, baby, etc.


I embossed the background paper then inked the edges with Soft Suede. The sentiment was cut out using the new Framelits Label Collection and stamped with the Elementary Elegance stamp set (available soon - it's in the Sale-a-Bration catty!) Believe it or not, the two pieces of striped patterned paper are from the same sheet of paper! See how where you cut out your label shape changes the entire look of the paper? Makes Stampin' Up!'s DSPs so versatile.

For this card I embossed the Melon Mambo card stock and then used my 2 1/2" circle punch to punch out the circle and half circles. The background image was created using various stamps from the Circle Circus stamp set in Melon Mambo, Blushing Bride and Concord Crush. For a little bit of sparkle I added some rhinestones. (I see that one has gone wandering ... oh well, too late to fix it now!)

For this one I used my Scalloped Trim Border punch all around a piece of Lucky Limeade card stock which I then stamped in Lucky Limeade with an image from the Take It To Heart stamp set. A banner in Melon Mambo and a few pearls finished it off.

This one may be my favourite. The butterflies are cut and embossed using the Beautiful Wings Embosslit die. I added the little antenae with a Stampin' Write marker. The curvy sentiment is from the Flight of the Butterfly stamp set.

And last but not least, I embossed the Concord Crush card stock and then rubbed some Whisper White Craft ink over the embossed image. Love that effect! The middle cut out was inked (liberally) with Lucky Limeade and an image from the Posy Punch stamp set was stamped in the middle. The Happy Birthday is popped up with Dimensionals.


To help keep things closed, I added these buttons and used some Bakers Twine to join them together.

Some Lucky Limeade Ruffled edge ribbon along the spine finishes things off.

Hope she likes it! Clicking on any of the links above will take you to my on-line store in case you want to purchase any of the products or check out pricing information. To see the new Occasions Mini, please click here.

Tuesday, January 3, 2012

Occasions Mini Birthday cards

HAPPY NEW YEAR! Hope you had a wonderful Holiday Season with your family and friends.

A few days ago, my Upline Sandra came over with her kids for a play date. Really, WE wanted to play! We'd both received our pre-order shipments from the Occaions Mini and Sale-a-bration catties and wanted to try out some of the new items. So we made sure the kids were fully engrossed in Lego or Wii and we got busy!

I have 2 aunts with birthdays coming up so I made a couple birthday cards.
This was the first one I made. I used Very Vanilla Card stock for the base and stamped it in Lucky Limeade with the butterfly image from the Sale-a-bration stamp set Elementary Elegance. The circle is punched out of Blushing Bride card stock with my 2 1/2" circle punch. Then the flower .. ah, the flower ... There is a new stamp set with matching punch in the Occasions mini that I LOVE! It's called Mixed Bunch and the punch is called Blossom. I stamped the top image and then both punched and fussy-cut it out and mounted it on top of another punched out flower from the Twitterpated DSP (see below for a close up of the flower). I held everything together with a brad from the Sale-a-bration Everyday Enchantment Ribbon & Brad pack. 
The ribbon along the bottom of the card is the new 3/8" Pleated Satin Ribbon in Blushing Bride and the Happy Birthday tag is cut out using the new Framelits Dies - Labels Collection.


I liked the design so much I did it again.


This time the background stamp I used is from the Mixed Bunch stamp set and I used Basic Grey ink and Baja Breeze card stock and pleated ribbon.

Hope my aunties like these cards! I also made a set of birthday cards for one of my aunts but I'll show you that in a few days (just in case she checks!)

Thanks for stopping by. The Occasions Mini catalogue goes live tomorrow so check my website for ordering information. Sale-a-bration starts on Januray 24th. For every $60 you spend on Stampin' Up! merchandise, you get a free item from the list.  If you are in need of some staples this would be a good time to stock up! You still have a few days to order Clearance Rack Blitz items - they go away after January 5th so act fast! These deals are A-MAZ-ING!!!

Have a good evening - see you soon!